Sweet and Salty Crunchy Nut Biscuits
A short and sweet biscuit with a perfect crunch - with or without nuts

This is one of those recipes that you come to treasure and carry with you because it’s a decided winner when it comes to teasing the taste buds and providing a sweet and salty treat for precious quiet moments, relaxing energy breaks and other special occasions.
The beauty of this wholesome biscuit is that there are no nuts in the biscuit mixture itself. Nuts are placed on top before baking, so you can mix them up with different nut toppings or leave the topping out completely - all in one batch. The addition of real Salt Crystals and Ground Cinnamon make for a festive flavour that delights at any time of year.
For this tried and trusted recipe, I tested out the option of melting the butter in a glass bowl over boiling water before mixing it into the sugar.
It feels a bit like cheating but when my butter is rock solid from being in the fridge, if I haven’t thought ahead and taken it out the night before, this work around is a lifesaver.
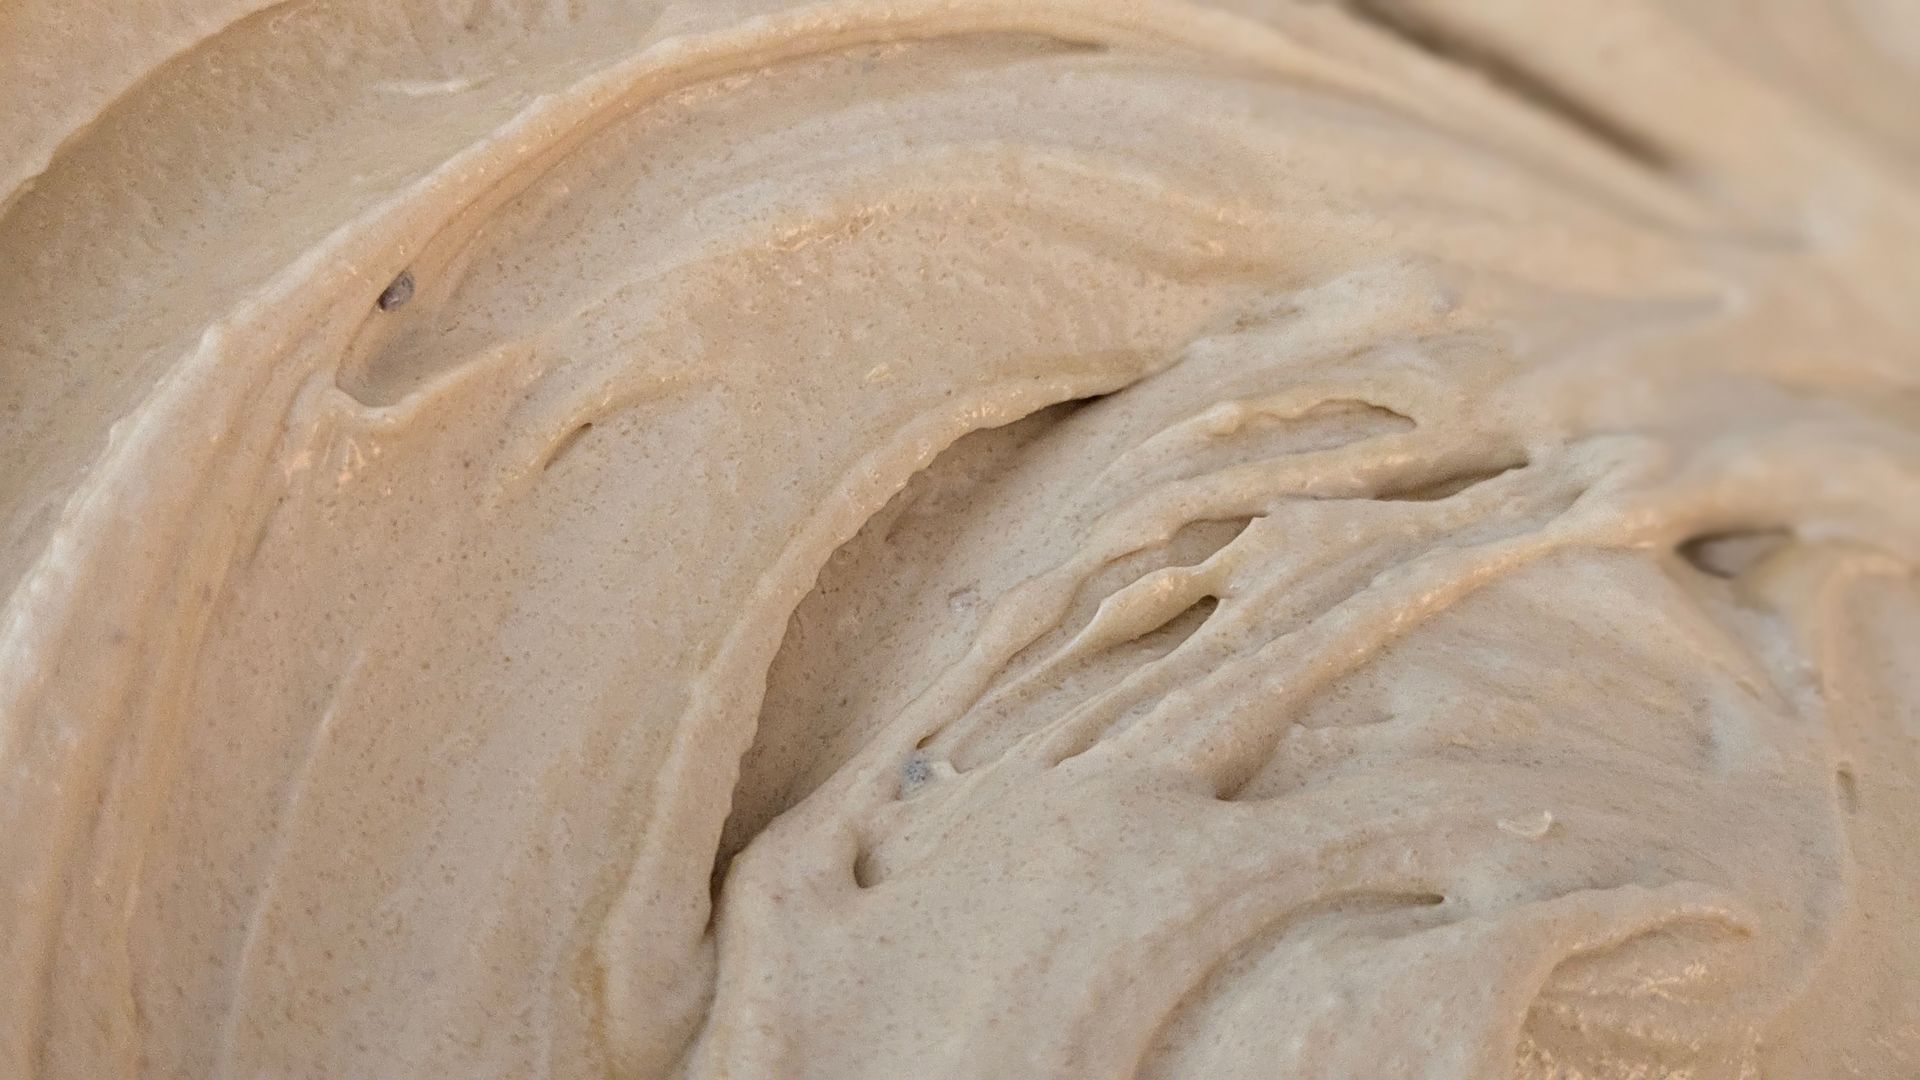
I discovered the trick is that when you have melted the butter, LET IT COOL before mixing it into the sugar. Then you can then easily whip up the mixture with either a small electric mixer or a large wooden spoon. It’s a pleasure making it turn so silky, pale and smooth. Being light with air, it produces an even shorter biscuit crunch.
I will take you through the entire process - step by step - with options for using softened or melted butter so that you can perfect your biscuit baking technique for all to enjoy.

Wholesome Ingredients
- 4 oz (500 gms) x Organic Butter
- 2 oz (50 gms) x Raw Cane Sugar
- 6 oz (150 gms) x Traditionally Milled or Wholegrain Spelt Flour (plain)
- 2-3 tsp x Celtic Grey Salt Crystals (or equivalent)
- 150 gms x Raw Coconut Milk
- 2 oz (50 gms) x Peanuts (plain roasted), Pecans or Flaked Almonds
Note: Add more nuts as required to fully cover the biscuit mixture surface or arrange as desired before brushing with Raw Coconut Milk.
Useful equipment
- 1 x large mixing bowl
- 1 x set of scales
- 1 x bread board or pastry board (large)
- 1 x large wooden spoon, large mixing spoon (or knife) and palette knife
- 1 x rolling pin
- 1 x pastry cutter (small)
- 1 x small electric hand mixer (optional)
- 1 x medium baking tray (plus another for extra mixture)
- 1 x wire cooling rack
- Items for presenting biscuits as gifts and for storage (see below)

Note about using REAL Salt Crystals
Do not use TABLE SALT for this recipe. It contains only 2 ingredients and has no flavour and hardly any nutritional value. Use only REAl Salt Crystals because this results in wonderful and occasional salty surprises in every biscuit. This is a MUST for making this recipe special and a delight for others to enjoy.
Use Celtic Grey Salt Crystals, Pink Himalayan Salt (semi-ground from larger crystals), Redmond Real Salt Crystals (the purest of all) supplied by reputable sources. You can also use Organic Sea Salt Crystals in granular form.
REAL Salt Crystals not only deliver delicious bursts of flavour in every biscuit, they also provide the most amount of essential minerals in varying amounts including iodine, potassium, magnesium and calcium.

How to mix and bake
Cooking Time: 10-12 minutes | Oven Temperature: 180C, 350F, Gas Mark 4
1) Turn on the oven to heat it up to temperature.
2) Add butter to a glass bowl and transfer to a small saucepan of boiling water until fully melted (Melted Butter Method).
3) ALLOW BUTTER TO COOL and start solidifying again before adding to the sugar in a large mixing bowl. (Melted Butter Method)
4) Alternatively, add pre-softened butter with sugar in a large mixing bowl and break down with the wooden spoon before mixing. (Soft Butter Method)
5) Mix butter and sugar together and for a good 10 minutes with the wooden spoon or use a small electric hand mixer to create a rich, smooth and creamy mixture.
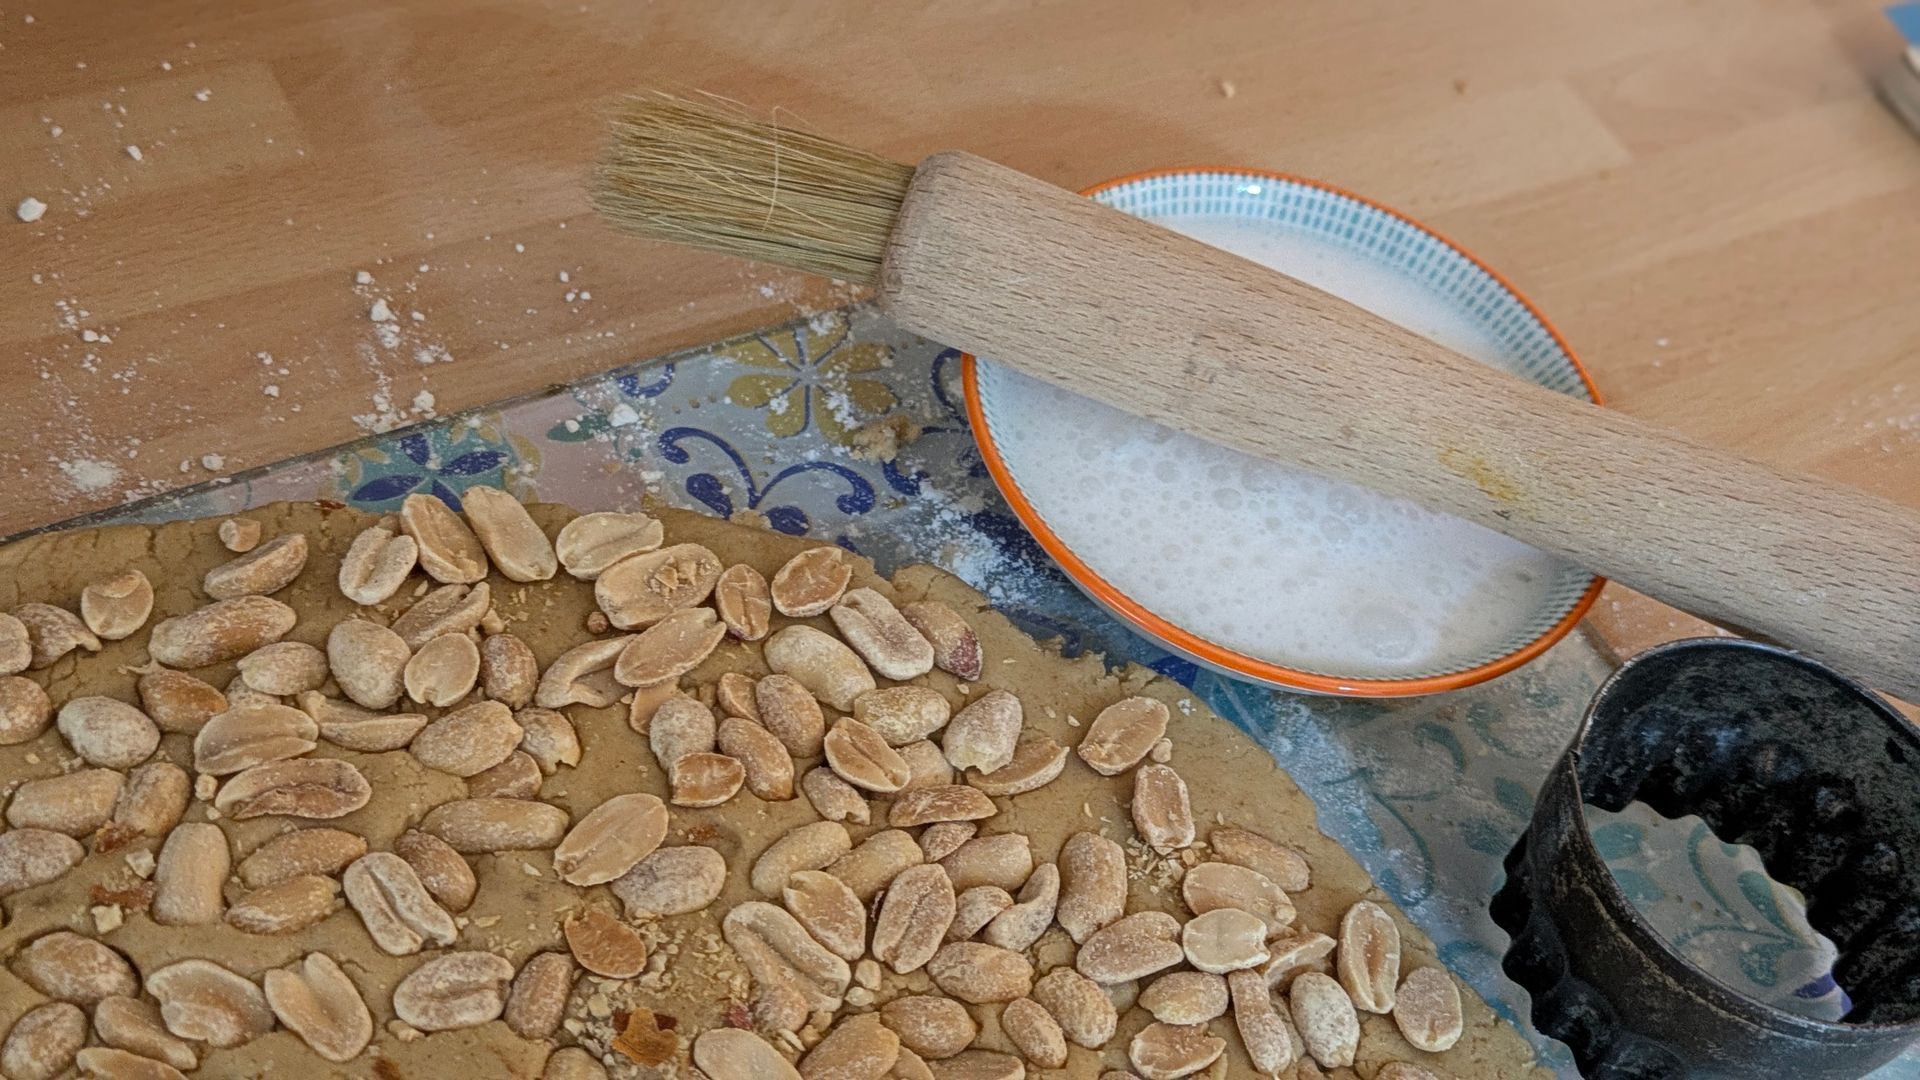
6) Gently fold in the flour, Celtic Salt Crystals and Cinnamon with a large mixing spoon (or knife) and add a splash of Raw Coconut Milk (if needed) to create a soft and stiff dough.
7) Knead into a ball and flatten onto a lightly floured bread or pastry board sprinkled with flour before rolling into a circle which is just over a quarter of an inch thick (6 mm).
8) Cover the surface with nuts and gently press them into the biscuit mixture before brushing with Raw Coconut Milk.
9) Cut into circles with a small pastry cutter (the perfect size for gift giving) and transfer them to a baking tray.
You can roll up any remaining pieces into a ball and roll out into a large biscuit placed on a separate baking tray. The nuts will now be contained in the mixture so you might want to add some extra nuts and a brushing of milk before baking.
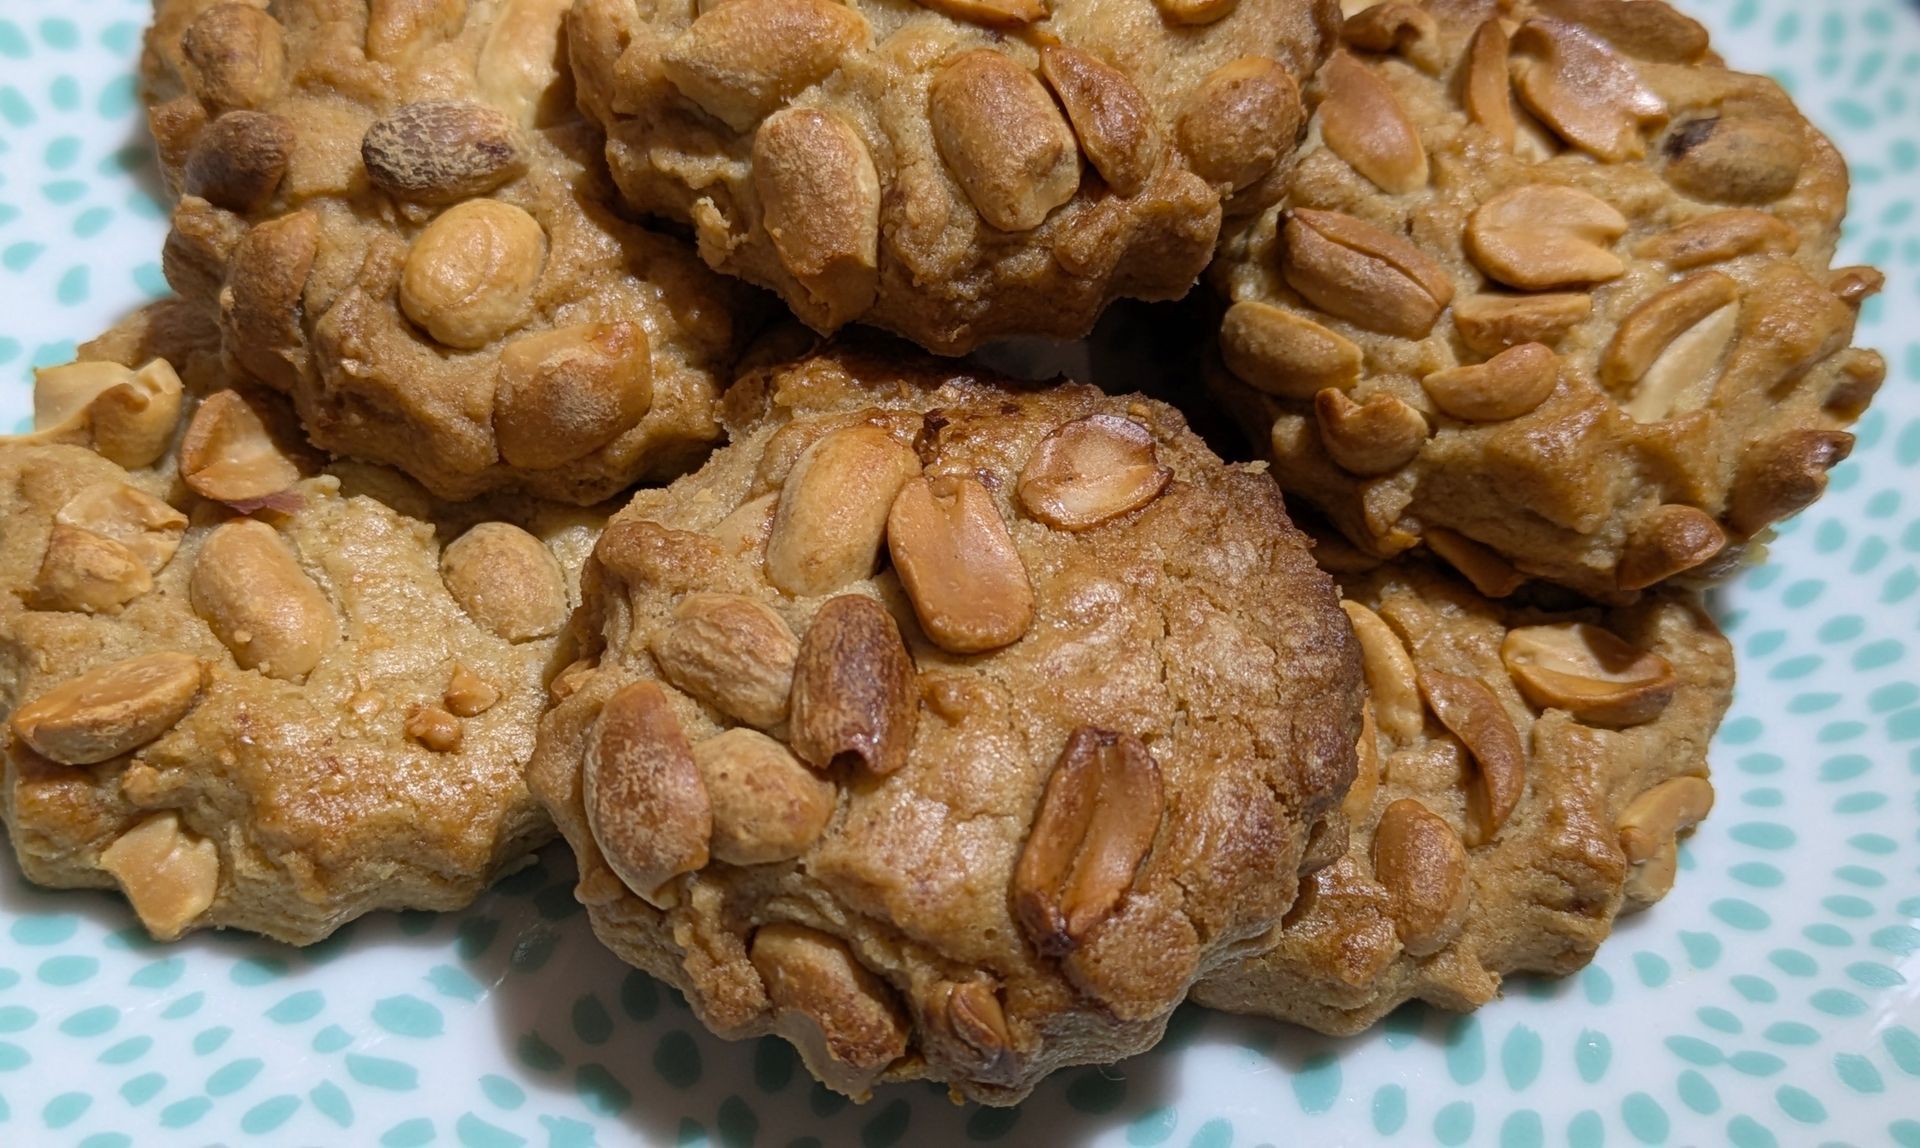
Note: You can bake the biscuits without nuts or mix them up with a variety of different nut or plain toppings. All will be as short and crunchy with or without a nut topping.
10) Arrange your biscuits on a baking tray with a palette knige so that they are about 1 in (15 mm) apart before placing in the oven.
11) Bake for 10-12 minutes or slightly longer if required until the biscuits turn golden brown.
12) Take out of the oven, allow to cool for a few minutes before transferring to a wire tray with your palette knife for cooling.
13) When cool, transfer into airtight containers, serve straight away or prepare to give as a gift. I have made a few suggestions on how to make the most of your cookies below.
Note: Store any biscuits not being eaten straight away or that day in airtight containers lined with a kitchen towel or paper napkin to preserve their crispy crunch.


It's a wrap
Homemade biscuits, cakes, preserves and other treats made with love and quality ingredients make wonderful presents at any time of year for family, friends, community get togethers, tea parties and other special occasions.
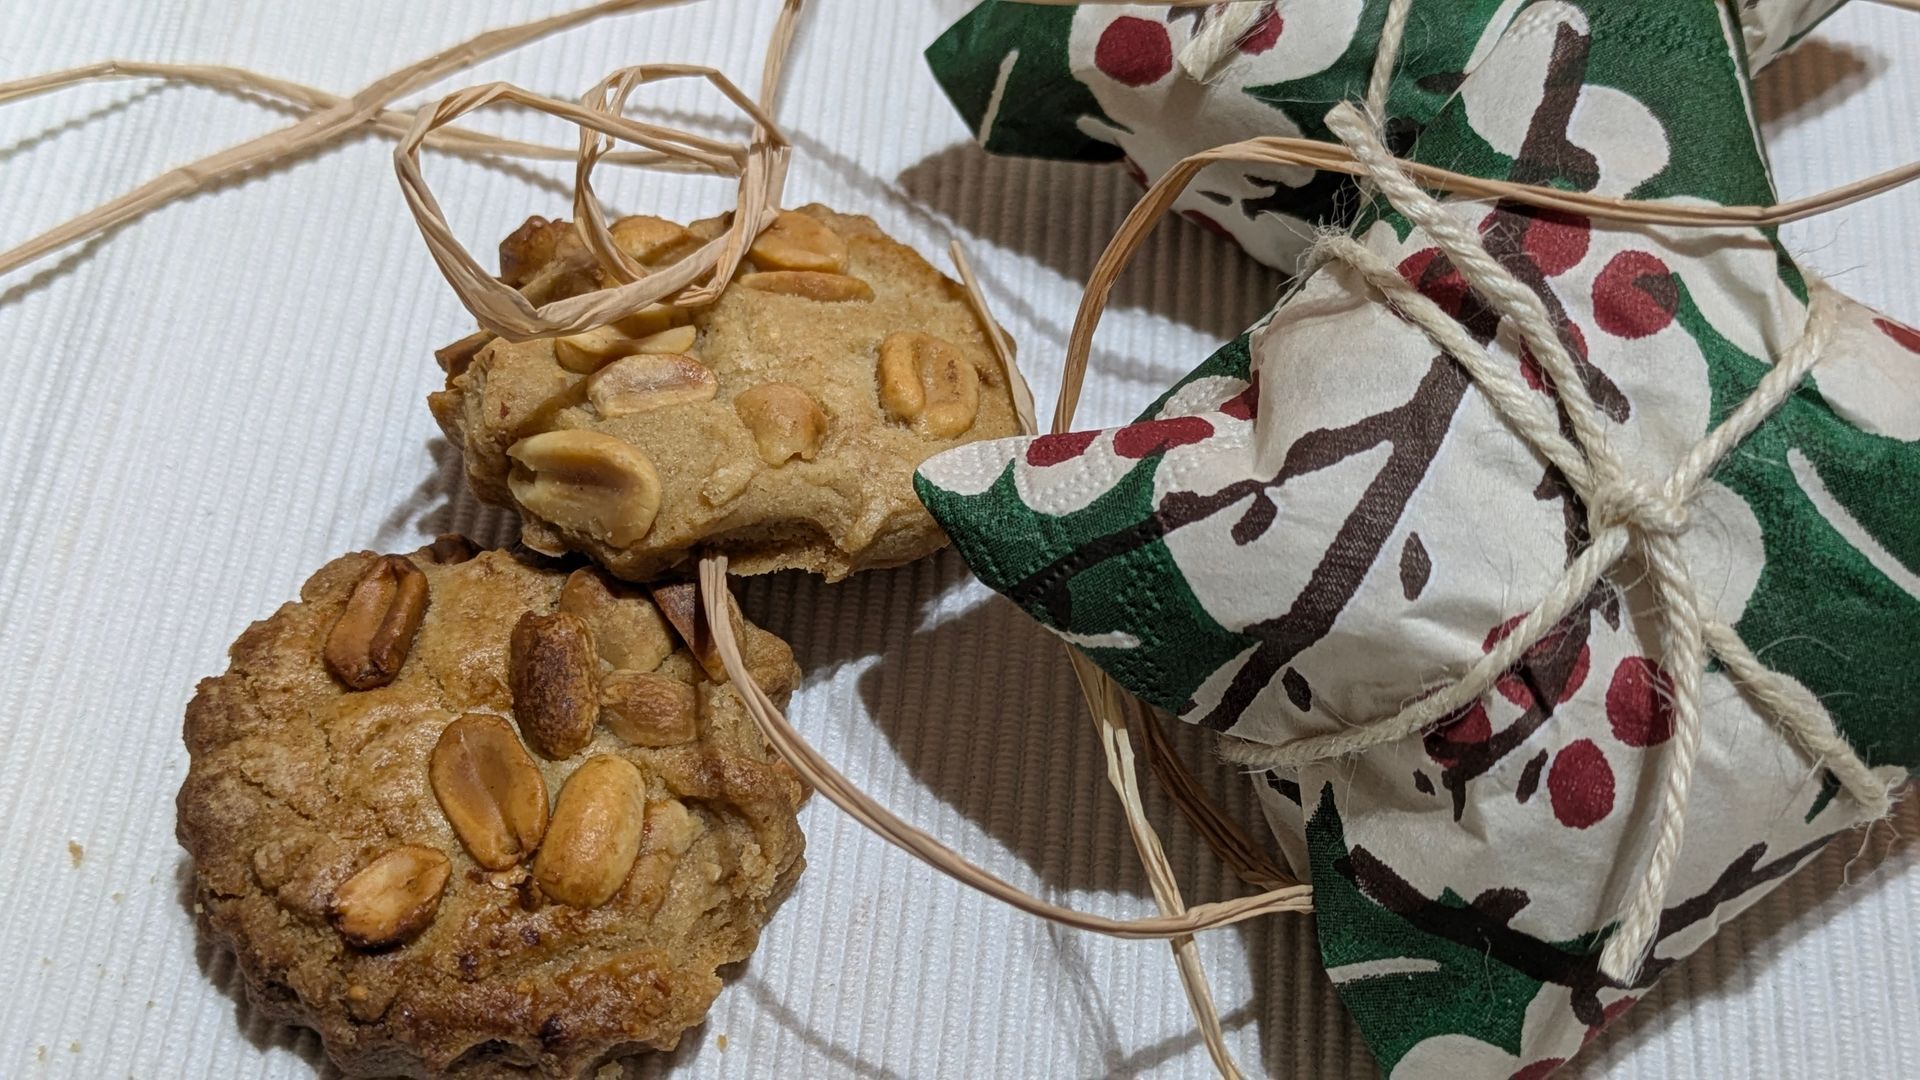
You can present your smaller-sized biscuits in different ways to give as presents or to become part of a festive table display. Here are some ideas:
- Wrap 1-4 biscuits in a festive napkin and tie with natural string or twine (add a homemade tag made with a piece of brown paper or card)
- Line a plain box with festive paper or a napkin and layer your biscuits inside. The bigger to box, the more cookies you can add. Wrap with a piece of colourful raffia string and add a label - as above.
- Layer biscuits in a glass jar so that they can be seen and admired. Write a sticky label to record what they are with a warning about nut content and date of baking.
- Add a couple of festive napkins to a bread board (or basket) and layer biscuits on top as a colourful centre-piece for the afternoon tea table.
I hope you feel inspired to enjoy creating, baking and presenting these sweet and salty, Cruncy Nut Biscuits which are sure to be gratefully received.
Wishing you a Happy New Year and look forward to seeing you again soon.
Sue Cartwright
Spiral Leaf
More recipes!
Beautifully illustrated cookbooks with wholesome recipes made with natural ingredients and foraged food.
The Hedgerow Handbook - Recipes, Remedies and Rituals by Adele Nozedar
The Hedgerow Cookbook by Caro Willson and Ginne Knox
Cranks Recipe Book by David Canter
The Cranks Bible - A Timeless Collection of Vegetarian Recipes by Nadine Abensur
Clicking on the above links takes you through to my affiliate bookshop. Spiral Leaf may earn a small commission on books sold at no extra cost to you!
Thank you for sharing!
for you, for me and for Mother Nature
Latest Posts


All Posts